Hi Dan85,
Good to see you are still alive.
Drop the motor;
http://www.amazon.com/Larin-ATVJ-2-ATV-M...B0007KS2TE
http://www.amazon.com/Motorcycle-Bike-St...ycle+stand
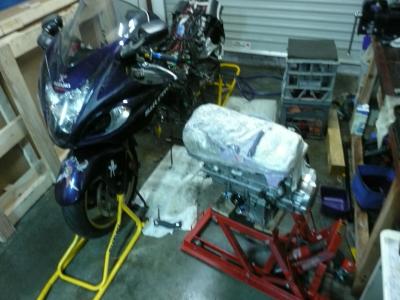
Will make life a lot easier. .......although, speaking from experience, after you've stuffed it up a couple of times yourself, (hopefully not), you'll get someone that really knows what they are doing to do it for you.
This was my second attempt (fuc*in brain injury!)....never mind the 3rd & 4th.
Posts: 2,424
Threads: 123
Joined: Mar 2007
Reputation:
1
19-04-2013, 04:04pm
(This post was last modified: 19-04-2013, 04:05pm by Dan85.)
Regards
Dan
You'll find those tools on the Schnitz Racing website.
.. also, a little bit slower, Suzuki Special Tools on ;
http://www.alpha-sports.com/tools/suzuki_tools.htm
There is also a hex tool needed somewhere & you can buy a metric/imperial hex set to fit onto a ratchet spanner at your good local tool shop.
...without reading back through the posts, if you do have a thicker than stock base gasket, you will have to re-degree your cams.
Your a brave man, there is no way I would try it without pulling the motor out.
Posts: 2,424
Threads: 123
Joined: Mar 2007
Reputation:
1
Not brave mate just stupid hahaha
Regards
Dan
Posts: 2,424
Threads: 123
Joined: Mar 2007
Reputation:
1
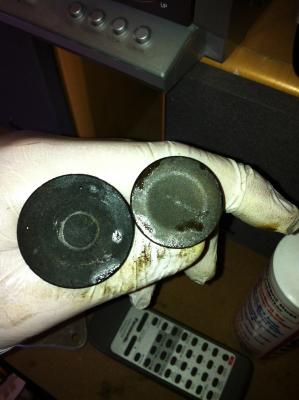
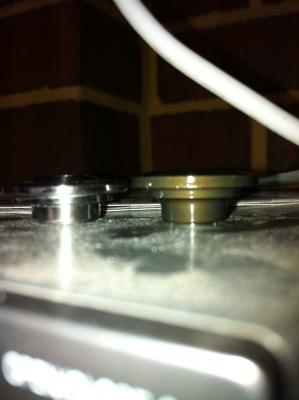
well while waiting for my special tool i had a good look over the buckets in the bike and found this. excuse the red fluff from my old underpants that are now a wipe down cloth 
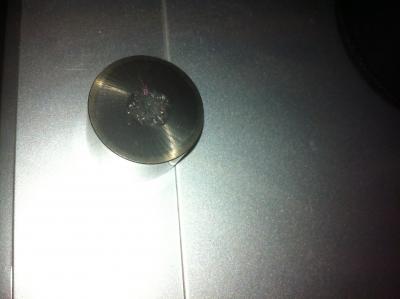
This is the only one like this and is the far left exhaust side bucket as you sit on the bike. luckily the previous owner gave me plenty of spare parts which included a few serviceable buckets(thanks Gavin saved me a few dollars! i just priced one and it was $60 plus postage  )
Regards
Dan
Posts: 2,424
Threads: 123
Joined: Mar 2007
Reputation:
1
11-05-2013, 09:17pm
(This post was last modified: 11-05-2013, 09:18pm by Dan85.)
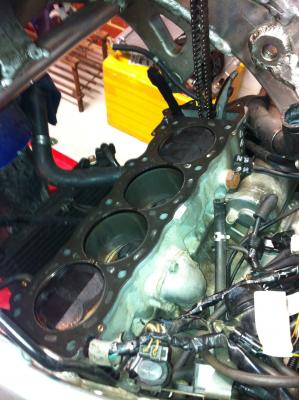
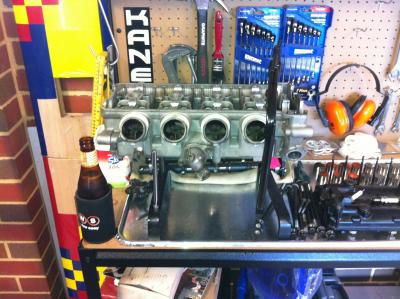
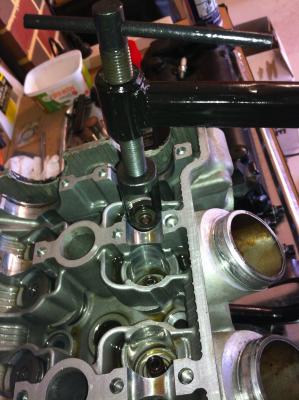
well shit got real now! hopefully it all goes back together! i got my special tools from the uk at less than half the price suzuki wanted. head came off and i got the current retainers, springs, seals and valves out. I pulled the head out without taking the motor out of the frame. it was actually pretty easy with a hand from my missus and a few cloths pegs to hold the two outside front head bolts up.
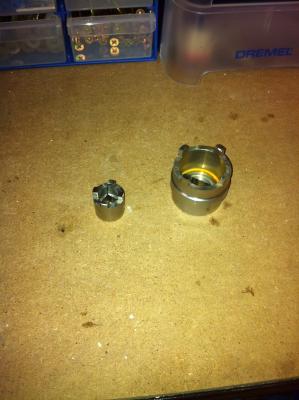
special engine mount tools
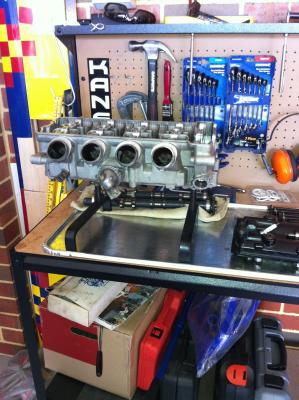
the head on my stand i got from VPW
the hole left by the head
Drinks Break!!
The spring compressor compressing springs
Intake on the left exhaust on the right. just an interest thing for the difference in vavle sizes
another interest one . the difference in height between an APE titanium retainer and the stock ones.
and a mostly empty head.
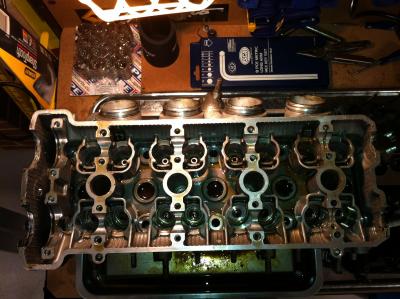
i started cleaning out the intake and exhaust ports(is that what they are called?) as they had alot of gunk in them.
Has anyone got any tips for installing new seals or just put a bit of oil on them and push them on?
Thanks for all your help so far everyone its been a great learning experience.
Regards
Dan
Posts: 959
Threads: 37
Joined: Aug 2008
Reputation:
15
12-05-2013, 09:58am
(This post was last modified: 12-05-2013, 09:59am by Camel.)
Dan, I make up a thickish slurry paste comprised of molybdenum disulphide grease and engine oil, applying a 'pat' to the inside of the seal. I then wiggle/rotate the seal on to the guide with my finger while applying subtle pressure. Then I check the spring clip has stayed in place, manouvering it back if it has moved. Then I apply more 'thinned' paste to the valve stem and insert the valve while keeping one finger over the seal end of the guide. That way any excess paste is forced into the spaces between the end of the valve stem and the inside of the seal. I wipe the excess around the inside of the bucket's mating surface on the head.
Cheers,
Camel
P.S. So that's the trick. Get the wife to help in the garage! I don't know if that would work in my case. My wife has refused to come near the Busa since the tenth anniversary run to Pemberton!
Posts: 2,424
Threads: 123
Joined: Mar 2007
Reputation:
1
Thanks mate ill give that a go. I told my missus I'd stop feeding her if she didn't help.
Regards
Dan
Posts: 198
Threads: 22
Joined: Apr 2012
Reputation:
0
hi dan,
not sure if ur aware or not but once u have the head reassembled
u can pour petrol down the ports while the head is sitting on its side,
to see if any of the valves are leaking or seeping.
a soda blaster works well to clean the head up of carbon,
using bi carb of soda under pressure with an air gun.
pete
08 gen 2 grey
Posts: 5,999
Threads: 193
Joined: Mar 2007
Reputation:
11
(03-05-2013, 08:50pm)Dan85 Wrote: well while waiting for my special tool i had a good look over the buckets in the bike and found this. excuse the red fluff from my old underpants that are now a wipe down cloth
This is the only one like this and is the far left exhaust side bucket as you sit on the bike. luckily the previous owner gave me plenty of spare parts which included a few serviceable buckets(thanks Gavin saved me a few dollars! i just priced one and it was $60 plus postage ) )
While its apart have a good look at the valve collets & the top of the valves where they sit in
Posts: 2,424
Threads: 123
Joined: Mar 2007
Reputation:
1
Simmo, good idea ill do that friday when i fly home. i had a pretty good look at most of the stuff i pulled out and the only thing that i saw that screamed broken was that bucket. everything else looked ok. ill give it all a clean down and have a closer look. cheers
Regards
Dan
Posts: 2,424
Threads: 123
Joined: Mar 2007
Reputation:
1
21-07-2013, 04:40pm
(This post was last modified: 21-07-2013, 04:41pm by Dan85.)
ok so I have installed the new springs retainers etc. My next question is can i do the valve shims while the head is out aligning the cams to the service manual alignments by hand or does it need to be in the bike to check the clearances? Just figured its easier to work on while the head is out of the bike. Thanks.
PS. Checked the tops of the valves and the stock keepers and no damage i could see. I did replace the keepers anyway.
Oh and the none of the valves seem to be leaking when i put a bit of petrol into them once the valves where back in. thanks
Regards
Dan
Posts: 2,186
Threads: 58
Joined: Mar 2007
Reputation:
13
Dan couple of blocks of wood to keep the valves off the bench and you can turn the cams to set the clearances
keep a log book with current shims, and clearances, so if you have to check them again you can have a record of any that may change quicker than others and know what shim sizes are needed before you pull it apart
Posts: 2,424
Threads: 123
Joined: Mar 2007
Reputation:
1
good idea! I just went through and threw the micrometer around the existing shims that had the numbers worn off and have written them all down so ill just make sure i keep that in the back of the service manual. Im a bit excited that its all coming back together. Thanks Maj.
Regards
Dan
Posts: 198
Threads: 22
Joined: Apr 2012
Reputation:
0
21-07-2013, 09:07pm
(This post was last modified: 21-07-2013, 09:10pm by pete.)
im not sure if its the same with the busa head,
but when u check the clearances with the head off,
do one cam at a time,
if u leave one cam bolted in and then put the other cam in and rotate
u could hit valves and bend them, hope that make sense.
jat, if u put new shims in, face the numbers down so the cam
doesn't wear the numbers off.
pete
08 gen 2 grey
|


 )
)

